Get the Stick! Good Boy

So, during yesterday’s side porch extravaganza, I’m sure a couple of readers said to themselves, “Oh, that Sippican. He’s putting in perforated drainage pipe just to move a little rainwater five feet further from the house. That Sippican! Overkill is his middle name.”

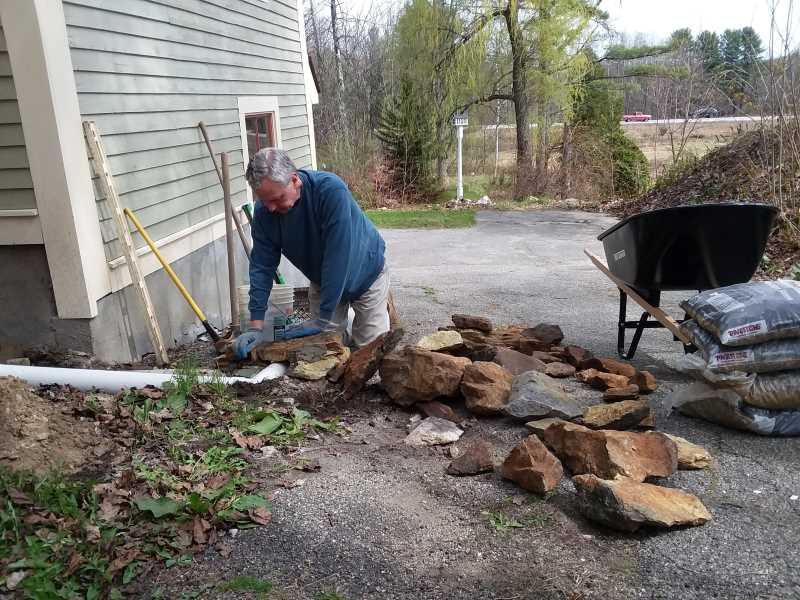
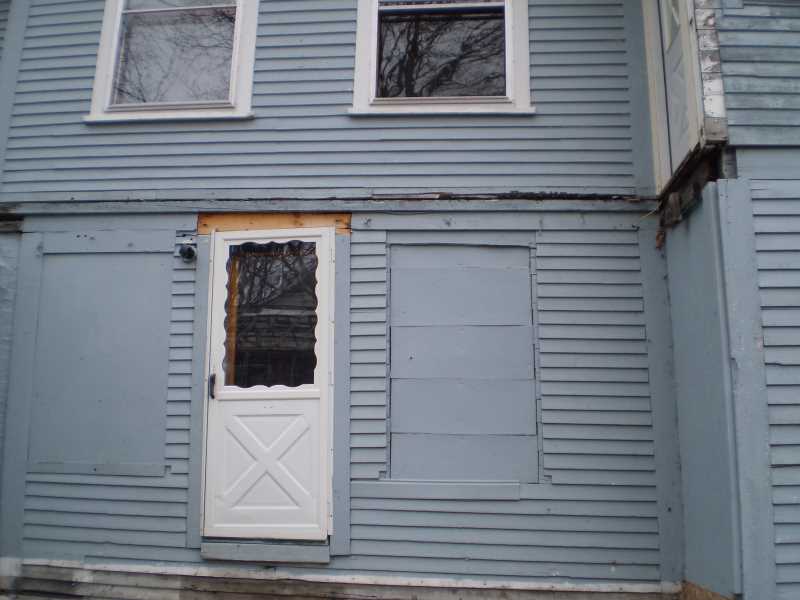
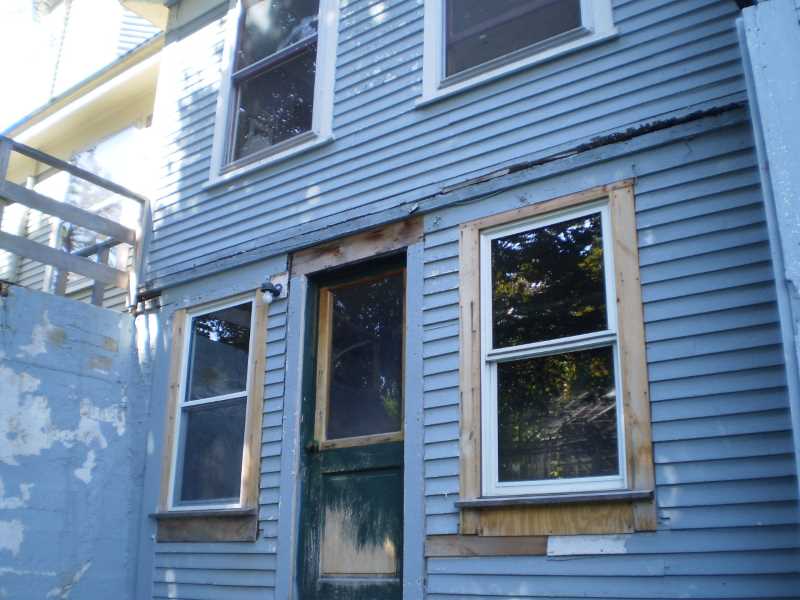
Well, my middle name is actually @#$%ing, but that’s neither here nor there. Let’s examine the facts, your honor, and see if this overkill is required. That first photo in today’s diatribe is the shed that’s tacked on the side of my basement basement, the one we just lifted 6 or 8 inches the other day. The opposite end of that shed is where the perforated pipe drain is buried. It shows the rough and ready doors the last occupants left for us. It had an old-fashioned hasp on it. It was meant for a padlock, but it had a twig stuck in it instead.

I used to grow peevish with my kids from time to time (alright, daily), and would say, “Where’s the shed stick? How could you lose the shed stick?” It almost never occurred to me to get another shed stick. I figured once I started breaking off a repacement twig from the surrounding flora, there’s be no end to it. Maine would be as flat as a parking lot in no time. But in the spirit of familial amity, and because divorce lawyers cost more than lumber, I decided to replace the door and do without the stick forevermore.

Let’s open those doors in the spring, and see what’s inside.

Hey look. Four or five inches of solid ice.

Well, I can see we won’t be mowing the lawn, or sitting down, until Memorial Day at the earliest. That’s why you take care of drainage when you get a chance, people. We moved that rainwater five feet, and it’s as dry as a bone in that shed now. But the shed needed a real, architecturally appropriate, twigless door. Let’s make one.

Now, you must know me by now, and you know I’m not going to spend money I don’t have. I cast a longing eye towards the fragment of one of the old barn doors we’d scavenged from the dump pile. That’s the back side of it. The front is beaded. The edges of the boards are tongue and groove, which makes for a great door. It keeps out rain and wind and skeeters and such naturally. I think the wood is chestnut. It’s basically an extinct species now, destroyed by a blight. They used to make darn near everything out of chestnut. Phone poles, horse stalls, furniture, fence rails, and anything else that needed cheap timber. It looks like the love child of oak and pine. It’s light, strong, easy to work, and doesn’t rot. Great stuff. Like most great stuff, there isn’t any anymore.

The door needs a plan. Let’s make one. Please remove yourself from the area if you’re skittish. I’ll be using a pencil and paper to make a plan. While not technically illegal yet, no one seems to be able to do it anymore. It’s computing or bust nowadays. I know how to do a little CAD drawing. I hate it, and it’s slower, and I can’t be bothered to wait five minutes for the tubes in the old Dell to warm up and ask me if I’d rather update Windows again now, or almost now. Scratch away and be done with it, I say. Here’s the plan:

Nobody pays attention to them anymore, but doors are supposed to have proportions. The stiles (upright members), the rails (cross members), and the panels need to look right and be strong enough to do their jobs. Since everything is stamped out of plastic or sawdust and glue these days, they hurl the rules down and stomp on them and make swollen misshapen everythings. But the rules were helpful back in the day. Lumber still comes mostly in dimensions that are useful for following the rules of proportions.

This door is a good example. We’ll make the frame out of leftover pieces of framing lumber. The bottom rail from a 2 x 8, the top rail from a 2 x 12, and the intermediate rail and stiles from 2 x 6s. Where do we locate the middle rail? We use another useful rule of thumb, the Golden Ratio. The easiest way to use it is to simply multiply the short dimension by 1.6 to get the long dimension. We know the bottom panels are @15-3/4″ wide, because that’s what’s left over from the stiles, divided in half. Multiply by 1.6, and you get something close to 24 inches. The arch at the top is a little more complicated. It’s a curve sprung from a point located near the center of the door. There are lots of ways to lay out arches, especially pointed arches, using just a compass. I probably just futzed it by springing a line that left 5 -1/2″ at the top center, and the full 11 – 1/4″ where the top rail meets the side stiles. This is how you find the spot on the door plan to plant the peg of the compass to draw the arc. I drew in some chamfers (the shaded areas surrounding the panels). I notice that spell check doesn’t know what the hell to make of the word “chamfer.” It’s lonesome knowing more words than the dictionary.

I know from experience that drawing any curved line with CAD programs is a more vexing problem than a sober prom date with a Navy Seal father. That’s why we still scratch away at the cottage. Saves time. And we ignore the spell check.

So we cut the top, middle, and bottom rails on the chop saw with a stop block on the fence, so they all turn out the exact same length. Forget measure twice, cut once. Measure once, put a stop block on the fence, and cut three times, and you’re done. If they’re wrong, they’re all the same kind of wrong, dammit. We  marked out the curve by banging a nail in the workbench, tying a string to it, tying a pencil to the other end, and pulling it around the curve. The string has to be the correct length, of course. The plan is on graph paper for a reason. You can just measure off it, three inches to a block. We cut the curve on the band saw.

Here’s the real hard part if you’re following along at home. You’re going to have to shoplift a domino joiner. No sane person would buy one, they cost like a grand now. It cost about half that when I bought mine. So don’t get caught, and steal some of those beech tenons while you’re at it, like the one you see in the picture. The tool makes a perfect mortise, and the beech domino is the perfect tenon for the mortise. Of course you can always cut the mortises and tenons with chisels and gent’s saws if you’re planning on living to be 10,000 years old, but for normal people, it’s shoplifting or nothing.

So every place the stiles meet the rails, you can see two tick marks where the domino tenons will go. We use the largest tenons we have, and glue them with exterior glue. It’s plenty strong. We’ll tighten up the joints with bar clamps and then back up the tenons with star point screws driven at an angle. The screws aren’t really necessary, but you can take the door out of the clamps right away if you use them. Screws make great clamps.

The speed square is placed in the corner to make sure the door is square. You can also check the door by pulling tape measures from corners to opposite diagonal corners, and comparing the two measurements. It’s a waste of time in this case. The door basically can’t go together without going together squarely.

[We’ll get back to making this door tomorrow. Thanks to everyone who reads, comments, buys my book, or hits the tip jar. It is greatly appreciated]

Eventually, Everyone Turns to Stone

By our standards, this job didn’t take very long. Not a lot of photo evidence, your honor, just circumstantial stuff. I bounced up and down that @#$%ing ramp outside that basement door for a plenty long time, but once we set our minds to replacing it, it was done pretty quick. There’s my spare heir painting a bit. We put new clapboards over the patchwork sheathing wall, and wove them in under the windows and such. We added a water table to the raggedy slot that the old ledger board from the catwalk once occupied. Multiple water tables look fine on an old Victorian/Arts and Crafts house. The A&C style especially liked horizontal bands on houses. They work to kick water away from the siding below them a bit, too. Big blank walls of siding look dreary anyway.

Before painting, we prime knotholes with BIN primer, which is shellac with white pigment in it. No water base or alkyd based primer works for that, no matter what the label tells you. Then we primed the raw wood with alkyd primer, because it works great, but mostly because we had some. The spare heir is caulking the seams where the siding and corner boards, etc. join together. Energy efficiency devotees love caulking, but they always use the wrong kind in the wrong places. We use plain painter’s caulking. It doesn’t have any silicone in it. It’s getting hard to find. Everyone wants silicone in all their caulking. Everyone wants their paint to peel, I gather.

Here’s the typical division of labor on jobs at my house. My son poses for Animal Crackers, and I work like I was twenty years younger than I am. I’m screwing down leftover decking from the front porch, to a deck suspended on 4 x 4 pressure-treated posts left over from lifting the back of the house. We offset the stairs from the door. There was a weird assortment of footings scattered around the sloping leftover space where the porch was being built. There was a flat, level, wide footing in one spot, and we’re going to land on it with the stairs.

The whole porch was assembled with better screws than I was used to seeing back in the day. These things are beastly strong and tap their own holes and frighten small children, delicate women, and men who wear spangled spandex to ride a bicycle.

Besides, it’s what they had at the local lumber yard. First we screwed a PT ledger board to the house. We put standoff blocks behind it to keep water from collecting behind it and rotting the house sill. Then we put in the posts on the two outboard corners. We found two footings from porches past, and decided the porch would look great with those dimensions, whether it did or not. We gave the framing the right pitch by laying a level on it, and assembled it with the Strong Bad screws. Quick and dirty, but plenty sturdy. We screwed an extra ledger board between the left-hand post and the intermediate post, which projects down behind the joist to accept it. That gives us a big landing surface for the stair stringers.

The right-hand post runs straight up and through. It’s a smart way to keep the railings from getting hinky over time. We used strap anchors to affix the stair stringers, used the same decking for treads, and had a working porch in one day. We’ll put an outboard railing on the left hand side there later. The railings ended up very sturdy, and they were sized to allow you to push snow off the deck without having to lift and throw it.

Here’s most of the balustrade in place. The top and bottom railings are just PT 2 x 4s. You cut matching bevels on the table saw on the top of them to shed water. You leave a flat spot in the center that’s the width of the square spindles. Then we cut some caps for the top of the posts out of cut-off planking, and made a four-sided pyramid cap to sit on top, also to shed water.

The outboard (left-hand) railing is in place now. We left it off as long as we could to allow us to work in the slot between the battered concrete wall and the new deck. We proceeded to paint everything. We sealed the knots with BIN primer, but other than that, we just put latex house paint right on the PT wood, including the decking. Many people think pressure treated wood is immortal or something. It doesn’t rot, usually, but it kind of works itself to pieces and looks like hell in a few years if you leave it raw. The siding and trim in the background is all painted now.

The porch looked swell and all, and I was plenty enthusiastic about turning the @#$%ing ramp into firewood, but the ground it sat on was still a dump. We scavenged some stone from around the yard to make a low wall and level out the ground. We buried a perforated pipe, because the roof overhead dumps rainwater something awful right in that corner. It has an outlet a couple of feet out on the driveway, to push the water away from the house.

The little wall took the curse off the slope, and we filled the void with crushed 3/4″ gravel around the pipe, soil we’d manufactured in a sawdust mulch pile, and some landscaping mulch to finish. Some of the stones have dollops of hidden mortar behind them to hold them in place.

Drill some holes in the bottom of a washtub, dump in some gravel and soil, and plant some posies. It ain’t the Boboli Gardens, but it’s OK for us. We ain’t Medicis.

[We’ll start a new project (we already started and finished) tomorrow. Thanks for reading, and commenting, and thanks to the anonymous donor on my Ko-Fi tip jar. It is much appreciated}

Do Your Best, With What You Have, Where You Are, Going as Fast as You Can

So you’re like me. You’re fixing an abandoned house in the butt end of nowhere. The question is not how good a job you can do. That doesn’t enter into it. The only question is how good a job you can do, with what you have, where you are, going as fast as you can. I know it’s a riff on Teddy Roosevelt, but he’s a fellow traveler for me, not the inspiration. I figure no one should judge anyone else using any other slide rule. It’s the question I’ve been answering for over ten years in this house. Maybe my whole life.

I’ve had my fingers in all sorts of construction projects over the years. Some vanishingly small, some pretty big, and lots in between. I’ve performed ridiculously fussy work, for substantial sums, and barbaric constructions where that was required. Our current house is a very particular kind of project for me, one I’m not sure I chose, but don’t mind that it was chosen for me, really. How good a job you can do, with what you have, where you are, going as fast as you can, between snow-shoveling sessions and firewood stacking interludes and scratching out a living is more accurate. The length of time it’s taken to turn this beat around bugs me. It punched me in the face to see a time date stamp from ten years ago on the house lifting pictures. But I was going as fast as I could, where I was, with what I had. I may be disappointed, but I’m not sheepish about the whole thing.

Readers are always curious about these sorts of projects. Home Improvement, they used to call it. What is it now? I’m not sure. I need a consultant to help me buy $35,000-worth of kitchen counters. My god, have you seen Pinterest, or egad, Houzz? Have you watched This Old House in the last decade? The question seemed to be how exacting a job can you expect with an unlimited budget and an army of workers in zip codes where I’d be arrested for trespassing if I got out of the car. Finished immediately, while being documented like a WPA project, by the way.

So I’m doing my bit by writing about making a hellhole into a livable home in a downscale, somewhat wild, faraway place. I’m not pretending to be a farmer or a rancher or whatever to cadge internet attention, either.  I see many younger people on the intertunnel longing for something like that, although their image of it seems to be glamping more than real homeownership to my eye. In the same way that going on vacation isn’t the same as traveling, looking longingly at pictures of log cabins in trackless forests on Tumblr won’t give you a real idea about how the domicile world works out where the roads only have one stripe on them. I live in a regular (Victorian) house in a village. Get your yurt fetishes and tiny house dreams elsewhere, I don’t mind.

But I’m telling you kids, you could do it. Give me an hour on Zillow and I’ll find you seventeen houses for fifty grand or less that need less work than mine did, sprayed all over the map. If I can fix a house, you can, because I’m not born to it any more than any of you. I just got interested in it early on, and kept going. You could too. Kids spend four years in college learning nothing and borrowing a hundred large for the privilege. You’ll get a better education and a house without a mortgage for the same money and time invested with my method. Find a place and fix it. You can do it.

So my readers will have to look at pictures from years back for a while, until I catch up with real-time and you see the other seventeen projects I’ve gotten up to recently. And I’ll look at the few pictures I have, trying to illustrate what I was doing with words, because I was going as fast as I could and didn’t have time to take many pictures. I’ll fib about some stuff, and guess about other things, because I moved on to the next thing too fast to remember what I just did. You’ll wonder how thing went from demolition to cabinet hardware without enough steps in between, and I’ll shed a tear over images of my children with childish faces that have disappeared into the calendars.

I was writing that that line, Do as good a job you can do, with what you have, where you are, going as fast as you can, referring to fixing a house, but it occurs to me it applies to most anything, especially raising children. And upon reflection, it’s the part about going as fast as you can that really matters. If you have big time resources and lots of help and plenty of time to think and plan and worry about your children, and oodles of free time to spend with them, you have a leg up on the average parent. But the speed is the same for everyone, I think. You better not hesitate, or linger over a single aspect of parenting, or the whole thing will disappear down a rabbit hole before you know it. You’ll be standing there blinking, with adults staring at you, wondering where did it all go? You’d kill to get down on the car carpet and play Matchbox cars with them one more time, but they want the car keys. Go big, go fast, or go home. A rest home. One of the ones they feature on Sixty Minutes.

I used to make a kind of joke at work, but it wasn’t really a joke, it was wisdom in disguise, though I didn’t realize it at the time. “I can do it faster than anyone who can do it better, and I can do it better than anyone who can do it faster.” It’s the kind of invincible stupidity that you need to tackle a home improvement project. I have it in spades. Get some. You’ll be glad you did.

[I’ll get back to pestering the side porch tomorrow. Thanks to everyone who reads, comments, buys my book, or hits the tip jar. It is greatly appreciated]

Plunging Into the Side Porch

Well, we finished propping up the front porch, and propped our feet up on the railing for a few minutes afterward, but the side porch needed renovation, too. Or more precisely, it would have, if it existed. Its molecules had disassembled themselves and moved on long before we showed up. In its place was a plunge to your death. I know that Plunge To Your Death would make a pretty good name for a Disneyland ride, or maybe a thrash metal band, but it makes for bad architecture. Our children are older, and can look after themselves, mostly, but I imagine if the former owners had kids, they advised them to stay out of the yard, and play in traffic, where it was safer.

These pictures were taken in my Blue period. This is what the house looked like when we moved in. Everything was this dreadful blue, the color of a de-commissioned Soviet battleship hull, and it certainly made me blue to look at it. That door is three or four feet in the air. It’s the entrance to the basement, which is above the basement basement we showed you when we lifted the back of the house a bit. The house once had a gallery catwalk that led from the driveway (dooryard, in Maine-speak) to the kitchen porch. That had a roof over it, attached to the house over the two windows you see. The catwalk led to the door currently sporting a fifteen-foot plunge to your death outside it. It was attached with plain nails to a ledger board on the house, and it served as a roof over some kind of long-lost porch-like structure outside the basement door. There was a mystifying assortment of footings scattered around the ground, so random I couldn’t even figure out what might have sat on top of them. From the quality and amount of fasteners I discovered in the wreckage, I wouldn’t have walked on any of it without checking my life insurance policy first, even when it was brand new.

I toyed with the idea of building a new catwalk until my daily headache morphed into a slight seizure. Too much work, too much money, too much time. We decided to get rid of the upper door, and make the enclosed porch into a giant pantry for the kitchen, and enter our house through the front door. I realize that anyone entering a house through the front door is currently frowned upon in architectural circles, if not actually forbidden. If you can find and open the front door on a typical snout house these days, it makes mummy’s tomb noises. We liked the idea of entering our house like we owned it, not like servants coming through a garage or something. We did own it, come to think of it. The house cost $24,000, and it was worth every penny. As you can see, it wasn’t worth a penny more, however.

It’s not a good photo, but I assure you I was standing upright when I took it. The house had been slumping for a long time. The windows probably started to stick when the frames got trapezoidal, so they ripped them out and boarded them up. We need a side porch, but we’ll have to fix everything while we do it. Luckily, there’s lots of lumber still kicking around from raising the back of the house and fixing the front porch. There’s plenty of 4 x 4s for posts, and some decking boards, and assorted other things we’d need.

Here’s how we got along for years until we could afford the time and material to fix the house. Oh, I remember the dark days of bouncing up and down that ramp. I ended up at the bottom of that ramp more than once, flat on my back in the snow, staring up at the stars, with a giant tray of hot ashes from the wood stove dumped on my chest. You don’t want an icy ramp outside your basement door, trust me.

That little wooden kneewall was the bottom of one of the barn doors that once served the back of the house. We found it at the bottom of a pile of debris in the back yard, and it was still pretty solid. There were still some hinges on it. Leather hinges. Tres elegante, n’est-ce pa? Eventually, we made a door out of its beaded boards.

A neighbor was bringing eleven plastic windows to the dump, and wondered if we wanted them instead. You betcha. They’re awful, but the price was right, and you could almost see your hand in front of your face at noon in the basement again. It’s a start. As you can see, I extended the railing around the plunge to your death to keep trick or treaters from getting too big a trick.

We pulled off a wafer-thin sheet of OSB sheathing, and found this underneath. Man, I thought I was the king of using everything you can lay your hands on to fix a house, but I can’t compete with that. I’m barely a viscount or squire compared to whatever king of trash put that together. That blue thing you see on the ground is the oil furnace that came with the house, lying on its side in the mud after we shoved it out the door. It was finally useful to us. You could stand on it and work on the windowsill. Other than that, it was always a 600-pound doorstop.

Well, I was fairly certain that bad things were going on behind that wooden sheathing quilt. My heir decided to help out and peel it off. He’s smiling for some reason. At our house, if you’re smiling, you’re not paying attention. Anyway, I appreciated the help. When we removed the patches, we weren’t disappointed. It was a mess. We’ll sheath over it properly after we replace the rotten stuff.

The kitchen porch death door was the first to go.

Interestingly, Kitchen Porch Death Door is the name of my Alice in Chains tribute band. But I digress.

[I’ll digress further about my side porch tomorrow. In the meantime, if you’d like to support Sippican Cottage digressions, please recommend this site to your online friends, and maybe leave a trenchant comment, or a regular one if you prefer. You can hit our tip jar if you’re feeling wealthy, because we’re not]

Entasis Saved My Bacon

Alrighty. We needed columns. There weren’t enough of the originals, and the ones we did have were either too short, splitting apart, or both. What’s a mother to do? We couldn’t afford to buy one new column, and we needed at least two, and we had to re-jigger three more. We were going to have to get resourceful, or get used to walking past screw jacks on the front of the house, forevermore. My wife voted for resourceful. We best start making things.

Why couldn’t we use the original columns? Because for the most part, they weren’t there. There used to be a lot more of them. As the porch slumped, they’d tumble out, and the former denizens would throw them away, or eat them, or whatever people do with all the things I need but can’t find to repair my house. Then, as the roof sagged, they’d pull out whatever columns remained, cut them shorter, and jam them back in the openings. When that didn’t answer, they bought two seven-footish columns and jammed them in there to stop (slow) the bleeding. These were carrying too much weight for their construction, and started to split open at the bottom.

Wood columns aren’t usually solid posts. They’re built like a barrel. A series of staves is glued up in a circle, and then the resulting tube is turned on big lathes to achieve entasis. I know achieving entasis sounds like the clinical description of some bizarre sex act, but it ain’t. I’ll try to explain it by cribbing from Wiki:

In architecture, entasis is the application of a convex curve to a surface for aesthetic purposes. Its best-known use is in certain orders of Classical columns that curve slightly as their diameter is decreased from the bottom upward. It also may serve an engineering function regarding strength.

See, that’s no help. I’ll translate for normal people. Real classical columns sort of bulge part way up, and then taper towards the top. There are many, many rules and ratios for determining entasis. I’m not sure it’s really possible to get entasis right, no matter what you do, but it’s very, very easy to get it wrong. I see lots of very weird columns on new faux-colonial houses, and egad, postmodern houses.

I learned all the column lingo and entasis ratios back in school, and filed it in the back of my head where I can’t get at it easily. But I remembered enough to finish the project. There is nothing on the internet as good as books on my shelf for naming parts of a column (there are a lot, trust me), but this will do if you’re at all interested.

It is fun to yell, “Hey, you don’t know your metope from your triglyph, pal,” as you drive past poorly architraved homes, but you’ll mostly get quizzical looks, especially if you forget to roll the window down first. But all the parts of a column and architrave are basically never on display on anything but Supreme Court buildings and similar dens of iniquity anyway. We only need to get a few barbaric proportions close, and it will look OK. I’m just the barbarian to try.

So my son and I had a jolly old time fixing the big columns. We used Gorilla Glue (polyurethane adhesive) to glue the staves back together at their bottoms. We used a windlass to pull them tight and hold them while they cured. At least that’s what I always thought was the term for tying a rope around something loosely, putting a stick through the rope, and turning the stick to tighten the loop. The internet doesn’t like calling that arrangement a windlass. If you try to look it up, it shows you lots of things that don’t look like what I’m describing, including blousy women who look like they raided Stevie Nicks’ closet, telling me about Dollar Tree life hacks. Hmm. Well, I say it’s a windlass clamp, and dare you to talk me out of it.

Once the column glue cured, we cut framing lumber blocks from the trash pile into the shape of the interior void inside the columns. The interior of the staves is not finished into a curve like the exterior is. It was vaguely hexagonal, or octagonal, I can’t remember now, and I can’t check because there’s a porch roof sitting on it.  Once we got the shape right, we put lots more Gorilla glue on the block and tapped it into the base of the column. Then we drove screws through the outside into the block. We fashioned and inserted blocks at the top of the columns, too. The columns were downright sturdy then. Still too short, though.

So we made a torus for the bottom of the column. We cut rough circles out of scrap lumber on the band saw. To make the rough circle a perfect circle, you clamp a disposable piece of plywood with a small peg driven into it to the platen of the band saw. The peg is located away from the blade at the radius dimension of the circle you’re trying to make. You drill a hole in the block at the radius length, sit the hole on the peg, and spin it through the blade to make a circle. Then you chuck a big roundover bit in the router (if you have a 1-1/2″ thick block, you need a 3/4″ roundover), round over the edge, flip it over, and round over the other edge. See, you’ve made a torus from trash. Before any of you math wizards try to correct me in the comments, it’s an architectural torus, not a mathematical torus, which looks like a donut. Believe me, I worked construction jobs for many years and know exactly what both kinds of donuts look like, and how they taste. The wood ones only taste different if you go to Dunkin’ Donuts early in the morning. In the afternoon, they both taste the same.

I couldn’t make the short columns properly. Or maybe I could, but I’m too lazy. You decide if it sounds better for me to admit I’m incompetent or indolent, and call me that. But I’m not going to cut a zillion little barrel staves with compound bevels and glue it all up while it wiggles in the clamps and then turn it on a lathe I don’t own, because they’re too long for mine. I’m gonna cheat.

I went down in our carhole, you know, the one we just lifted, and found a 6″ x 6″ beam left over from 1901. I also found a 5-1/2″ x 5-1/2″ pressure treated beam that had formerly been used as an ineffective prop down there. Woohoo, free columns! Sorta. I still couldn’t fit them in my lathe, which is plenty big for table legs, but not for porch columns. Here’s where entasis saved my bacon.

The simplest way to figure entasis is to make the first third of a column a straight shaft, and taper the top two-thirds. So we cut the timbers at the 1/3rd mark, and I turned them round on the lathe. Then I chucked the top 2/3rds into the lathe, which just fit, turned it round, and then tapered it from one end to the other. Then we cored a big socket in the two pieces, inserted a piece of wooden closet rod, and glued the whole mess up. We turned the bases of the columns, which include a torus and a scotia and an astragal, and whatnot, out of cut-off pieces of the timbers. We did some fancy measuring to make sure all the components added up to the required gaps between the kneewall and the box beam overhead. We added stylobates at the bottoms made from cut-offs from pressure treated lumber. Aren’t you impressed I called them stylobates, instead of plain old square wood blocks? I thought you would be.

Shingling the curved wall was easy and hard at the same time. I let the kid bang a lot of the nails. On a flat wall, shingling is easy because you tack on a straightedge, sit the shingles on it, and nail them to the sheathing. No can do on a curved wall. So we made a story pole. A story pole is just a stick with measurements marked on it. You lay the story pole on the shingled wall on the right, and mark the bottom of each shingle course on the story pole. Then you can move it around the curve as needed to get the courses to line up. The lad did a pretty good job, I must say, and painted the shingles, too, while I painted the trim and the deck. Here’s what it looked like when it was finished

Not shabby. Or less shabby, anyway.

For a while, the feeling of being part of the process made the porch seem more fun to my son than it had previously. He liked hanging around on it afterwards.

The cat had to commute around the side to get at the rodents now, and wasn’t as enthusiastic.

Well that’s it for the front porch. But oh dear, there used to be a side porch, too, and it rotted away and fell off the house years before we showed up. I guess we’ll have to fix that one, too, with whatever lumber is left over. Stay tuned.

[If you’d like to support Sippican Cottage, please recommend it to your online friends, and maybe leave a trenchant comment, or a regular one if you prefer. You can hit our tip jar if you’re feeling wealthy, because we’re not]

Month: August 2023

Find Stuff:

Archives