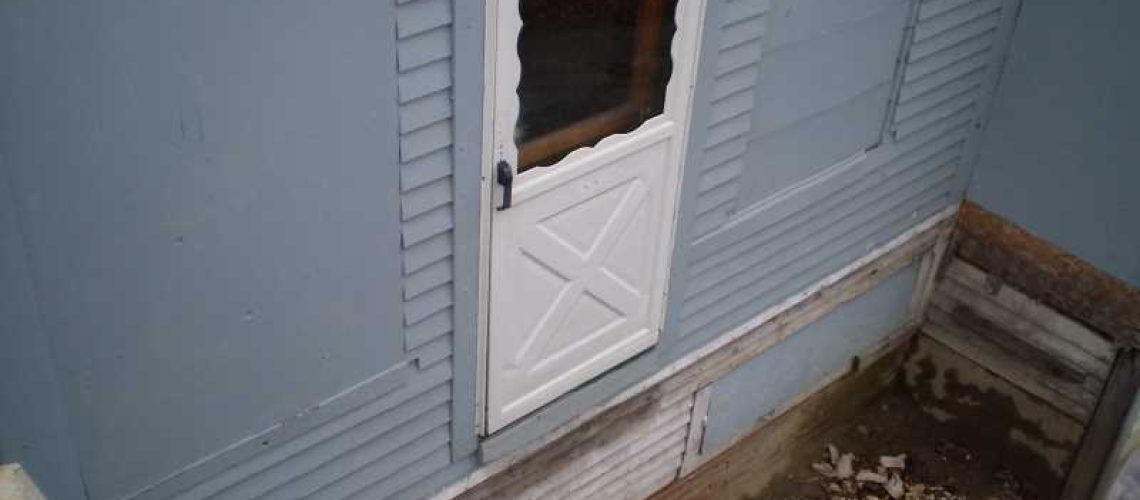


By our standards, this job didn’t take very long. Not a lot of photo evidence, your honor, just circumstantial stuff. I bounced up and down that @#$%ing ramp outside that basement door for a plenty long time, but once we set our minds to replacing it, it was done pretty quick. There’s my spare heir painting a bit. We put new clapboards over the patchwork sheathing wall, and wove them in under the windows and such. We added a water table to the raggedy slot that the old ledger board from the catwalk once occupied. Multiple water tables look fine on an old Victorian/Arts and Crafts house. The A&C style especially liked horizontal bands on houses. They work to kick water away from the siding below them a bit, too. Big blank walls of siding look dreary anyway.

Before painting, we prime knotholes with BIN primer, which is shellac with white pigment in it. No water base or alkyd based primer works for that, no matter what the label tells you. Then we primed the raw wood with alkyd primer, because it works great, but mostly because we had some. The spare heir is caulking the seams where the siding and corner boards, etc. join together. Energy efficiency devotees love caulking, but they always use the wrong kind in the wrong places. We use plain painter’s caulking. It doesn’t have any silicone in it. It’s getting hard to find. Everyone wants silicone in all their caulking. Everyone wants their paint to peel, I gather.

Here’s the typical division of labor on jobs at my house. My son poses for Animal Crackers, and I work like I was twenty years younger than I am. I’m screwing down leftover decking from the front porch, to a deck suspended on 4 x 4 pressure-treated posts left over from lifting the back of the house. We offset the stairs from the door. There was a weird assortment of footings scattered around the sloping leftover space where the porch was being built. There was a flat, level, wide footing in one spot, and we’re going to land on it with the stairs.
The whole porch was assembled with better screws than I was used to seeing back in the day. These things are beastly strong and tap their own holes and frighten small children, delicate women, and men who wear spangled spandex to ride a bicycle.

Besides, it’s what they had at the local lumber yard. First we screwed a PT ledger board to the house. We put standoff blocks behind it to keep water from collecting behind it and rotting the house sill. Then we put in the posts on the two outboard corners. We found two footings from porches past, and decided the porch would look great with those dimensions, whether it did or not. We gave the framing the right pitch by laying a level on it, and assembled it with the Strong Bad screws. Quick and dirty, but plenty sturdy. We screwed an extra ledger board between the left-hand post and the intermediate post, which projects down behind the joist to accept it. That gives us a big landing surface for the stair stringers.

The right-hand post runs straight up and through. It’s a smart way to keep the railings from getting hinky over time. We used strap anchors to affix the stair stringers, used the same decking for treads, and had a working porch in one day. We’ll put an outboard railing on the left hand side there later. The railings ended up very sturdy, and they were sized to allow you to push snow off the deck without having to lift and throw it.

Here’s most of the balustrade in place. The top and bottom railings are just PT 2 x 4s. You cut matching bevels on the table saw on the top of them to shed water. You leave a flat spot in the center that’s the width of the square spindles. Then we cut some caps for the top of the posts out of cut-off planking, and made a four-sided pyramid cap to sit on top, also to shed water.

The outboard (left-hand) railing is in place now. We left it off as long as we could to allow us to work in the slot between the battered concrete wall and the new deck. We proceeded to paint everything. We sealed the knots with BIN primer, but other than that, we just put latex house paint right on the PT wood, including the decking. Many people think pressure treated wood is immortal or something. It doesn’t rot, usually, but it kind of works itself to pieces and looks like hell in a few years if you leave it raw. The siding and trim in the background is all painted now.
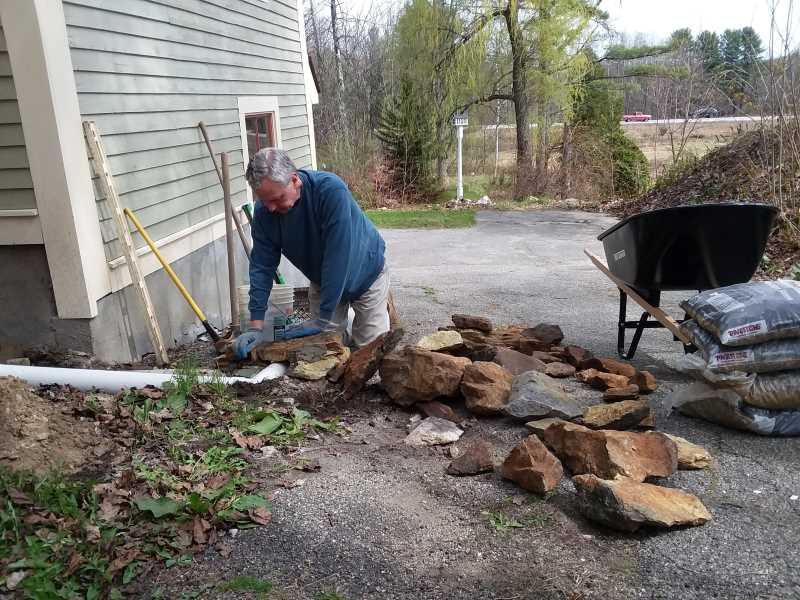
The porch looked swell and all, and I was plenty enthusiastic about turning the @#$%ing ramp into firewood, but the ground it sat on was still a dump. We scavenged some stone from around the yard to make a low wall and level out the ground. We buried a perforated pipe, because the roof overhead dumps rainwater something awful right in that corner. It has an outlet a couple of feet out on the driveway, to push the water away from the house.

The little wall took the curse off the slope, and we filled the void with crushed 3/4″ gravel around the pipe, soil we’d manufactured in a sawdust mulch pile, and some landscaping mulch to finish. Some of the stones have dollops of hidden mortar behind them to hold them in place.

Drill some holes in the bottom of a washtub, dump in some gravel and soil, and plant some posies. It ain’t the Boboli Gardens, but it’s OK for us. We ain’t Medicis.
[We’ll start a new project (we already started and finished) tomorrow. Thanks for reading, and commenting, and thanks to the anonymous donor on my Ko-Fi tip jar. It is much appreciated}
3 Responses
I haven’t been enthused about green-treat lumber since I put in a fence post to support a gate…the original post had rotted at the base and busted off at the ground. I dug out the rotted remains of the post and enlarged the hole, going down about 4 feet to get below the Minnesnowta frost line.
I bought an 8 foot PT 4×4 and a couple of bags of quick-set cement. Stuck the post in the ground, used a couple of scrap 2×4 and a couple of stakes to hold it upright and square and mixed up the cement, poured it in the hole, trying to get all the air pockets out of it with T-pole. I sloped the upper surface of the cement away from the post to the ground and called it a day.
When I came back in the morning the post, from the ground up, had twisted itself 45° from where it had been. I’d never seen anything like it. That thing warped itself so badly that it was unusable. Dug the whole dang thing out, threw it away, and did over with a regular (untreated) 4×4 that I painted twice with oil-based primer, and then put it the same way.
Have you noticed that the PT lumber is now coming into the lumber yards soaking wet, apparently not kiln-dried, and all of it warps like crazy?
Yet another fabulous tale of improvising and adapting from you; thanks again.
ah ha! So that’s what is going on with my little “seed-growing thing”. It is an 8×8 box with two planters making up the sides that are about 30″ deep. I am sure you have seen pictures on Gardener’s Inc. My dear Son in law, daughter, and husband decided to build this lovely treasure for me for Mother’s day in 2021. It has some kind of landscape wire running up to the top frame to protect it from the deer. Of course, those darling little squirrels in the tree close by are practicing their aerial tricks to get inside.
Ok. moving on, this box is built of lovely pressure-treated and stained cedar. The second year out, the smaller pieces of 4×4 used for door frames and the horizontal framing holding up the wire, started twisting.
I desperately need a roof on this little gem. However, DH does not want to do wood, he wants to do PVC pipe so we can lay fabric over the top of this dome thingy. You know–we’ve been married for 41 years now–I still love to see the guy walk into the room. HOWEVER, you’d think by now he would understand that I am not now, nor ever have been of the “hippie” funk type. Every once in a while I have to remind him–think Quaker–not hippie! But at least now I know what the real problem is–it’s the pressure treated wood–not wife! 🙂
Hi Blackwing- Thanks for reading and commenting.
Pressure treated wood is sold a a panacea for everything outdoors. You and I know that it ain’t. It won’t rot, and bugs think it tastes funny, but that’s about it. It will work itself to pieces without rotting, and it’s prone to warps and twists like you described.
It’s made from the nastiest grades of southern yellow pine. It is kiln dried, however. The reason it’s sopping wet at the lumber yard is that they infuse it with the liquid treatment after it’s kiln dried. It’s put in a pressurized bath of alkaline copper quatenary (ACQ). It used to be treated with copper chromated arsenate, which was a much better preservative, fungicide, anti-bug stuff, but the arsenate word made people nervous and they stopped using it.
It comes right out of a liquid bath, strapped in bundles, and sold ten minutes later in the orange places all over the country. As one of my other commenters noted, it shrinks like crazy after you install it. We used to put a framing nail between every deck board for spacing. Now you install the planks tight and let them shrink to get spaced apart.